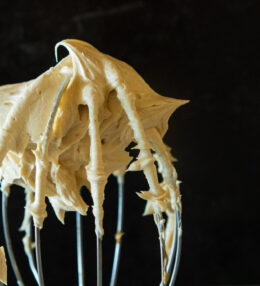
This Cream Cheese Buttercream Icing is a wonderful addition to your buttercream repertoire. It’s easy to make and has a tangy, slightly less-sweet taste than traditional buttercreams.
And, it’s easy to make!
Beat softened cream cheese and butter until it’s fluffy. Add milk and vanilla bean seeds and continue to beat. Gradually add in the powdered sugar and beat until smooth.
If it’s a little thin to decorate with, add a bit more powdered sugar. If it’s too thick, add more milk, a teaspoon at a time.
That’s it…now you are ready to add food gel coloring to decorate.
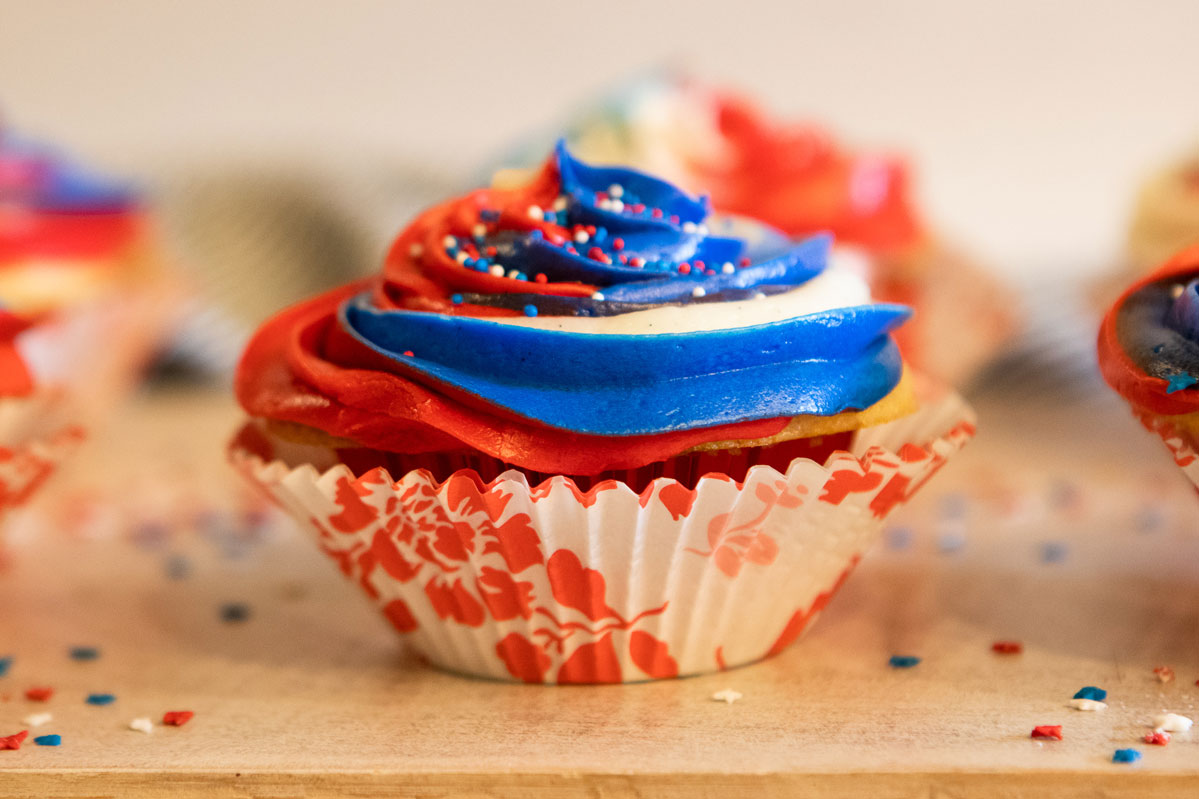
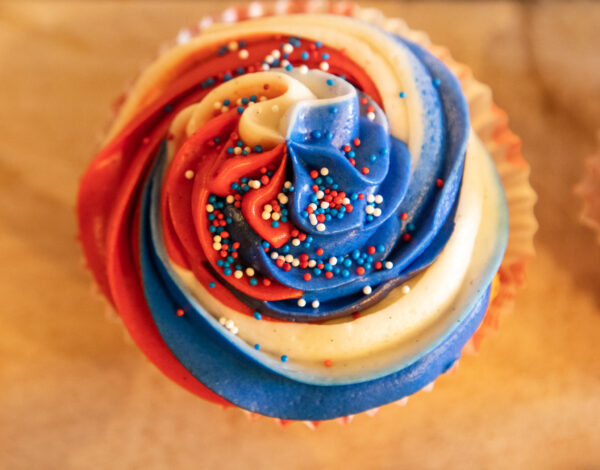
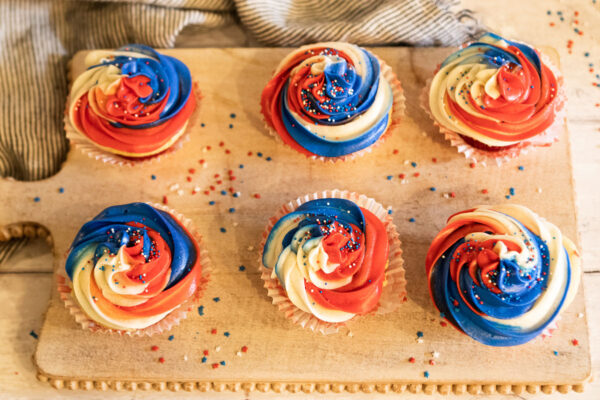
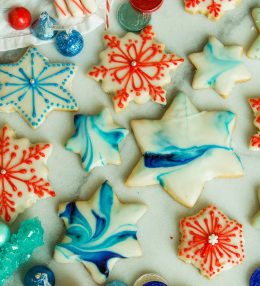
If you’d like to make the Fourth of July cupcakes pictures above, follow the decorating instructions in Fourth of July White Chocolate Confetti Cupcakes or in the recipe. By the way, this recipe can be used for any holiday, just change the icing colors!
Share Your Thoughts...
Lastly, if you make Cream Cheese Buttercream Icing, be sure to leave a comment and/or give this recipe a rating! Above all, I love to hear from you and always do my best to respond to each and every comment. And of course, if you do make this recipe, don’t forget to tag me on Instagram! Looking through the photos of recipes you all have made is one of my favorite things to do!
Cream Cheese Buttercream Icing
Makes: enough to frost 18 cupcakes
Total Time: 15 minutes
Ingredients
2 ounces cream cheese softened
1/2 cup butter softened
1 vanilla bean halved and seeds scraped or 1 teaspoon vanilla bean paste or 2 teaspoons vanilla extract
1/2 tsp almond extract
4-6 tbsp milk
6 cups powdered sugar
Instructions
Beat cream cheese and butter on medium speed until light and fluffy, about 5 minutes.
Add 4 tablespoons of milk and vanilla bean seeds (or vanilla bean paste or vanilla) beat again for 2 minutes.
Gradually beat in powdered sugar. Beat until light and fluffy. If too thick add a bit more milk, just a teaspoon at a time. If too thin add a bit more powdered sugar. (It needs to be thick enough to hold its shape, but not so thick that you have difficulty swirling the icing through the decorating tip.)
Instructions for the Swirl Technique:
Prepare icing as directed and divide into two or three bowls, depending on how many colors you want in your swirls. Add food coloring to achieve desired colors. I really like the gel food coloring, it gives much deeper, richer colors and comes in a wide variety of beautiful hues.
Lay out 2 or 3 (depending on how many colors you are using) pieces of plastic wrap (approximately 18″-20″ long) on your work surface. Spread out the contents of each bowl on a separate piece of the plastic wrap lengthwise, forming a rectangle, approximately 8″ long. Starting with one long side, fold plastic wrap over the icing and roll into a cylinder-shaped tube. Secure both ends with a knot. Repeat with the remaining colors.
When you’re ready to ice the cupcakes, fit a large pastry bag with a large star decorating tip. (I use a Wilton 1M) or snip a tiny corner off of a gallon-size zippered bag and fit with a large star decorating tip.
Cut off one of the knot ends from each tube and place tubes in prepared pastry bag. Pipe cupcakes as desired. Have fun watching the three beautiful colors unfold!
Chef’s Note:
Red and Blue icing can be difficult to achieve.You can continue to add the gel food coloring until you have a deep shade of each color, but it might turn your teeth and lips blue or red!Instead, get to a shade that you like, and then let the icing sit for 24 hours on the kitchen counter.The colors will intensify as time goes on.


Leave a Review