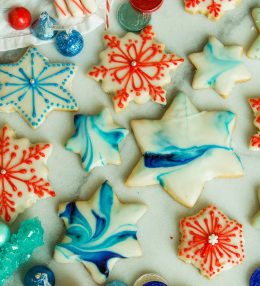
Royal Icing is the perfect frosting to decorate cookies. It has only a few ingredients and is very simple to make! The only trick to royal icing is getting the correct consistency for what you are trying to achieve.
Typically, I like to create a “border” around the outside of the cookie with a thin line of icing. I let this firm up a bit, and then I “flood” the interior of the border with a more runny icing.
I have found the following tutorial from Sweetopia to be very useful in achieving the correct consistency:
Decorating cookies is often called flooding because you can essentially create a dam, wall or outline of icing on the edge of your cookie, and thenflood or fill in that dam with icing.There are those who like to decorate without using a dam by just applying the icing, but I find that I’m able to add more icing onto the cookie when the dam holds it in, therefore making the cookie surface look more thick and rich.
You have to begin with a great Royal Icing Recipe.My favorite is from Bake from Scratch and is linked here.
Icing Tips and Tricks:
One of the most important things I’ve learned about cookie decorating is that if your icing isn’t at the right consistency or thickness, the experience can be very frustrating.
So, once you have made the icing, it usually needs to be thinned a bit to create the best consistency for decorating.This means that it needs to be fluid enough so that it will flow just enough that it settles into your cookie dam, but not too much so that it runs over.
Add just drops of water at a time to make the icing runnier.If you add too much water at a time it’s more difficult to thicken it with icing sugar than it is to add water to it.The trick I use to make suremy icing is at the right consistency, is called the “10 second rule“.Drag a butter knife through the surface of your royal icing and count to 10.If the icing surface becomes smooth in anywhere between 5-10 seconds, then your icing is ready to use.If it takes longer than approximately 10 seconds, the icing is too thick.Slowly add more water.If your icing surface smoothes over in less than 5-10 seconds, it is too runny.Mix your icing longer or slowly add more sifted confectioners’ sugar to thicken it.
Some people use a thicker consistency icing to outline their cookie shape and then a runnier one to fill it in.I have come to prefer using the same icing to outline and flood because it saves me time.(I don’t have to prepare two icings for each color, prepare two piping bags for each color etc.).That being said, the icing then can’t be too runny, because the outlines will not form properly.
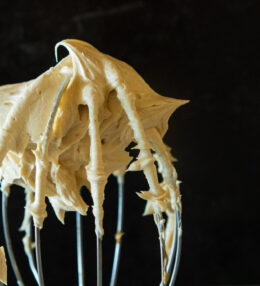
Some decorators like to flood their cookies with a very runny icing, so if you are one of them, prepare two icing consistencies, one thicker, one runnier.The thicker icing should not be so thick that it is dry and curls when you try to pipe it.It should just hold its shape when you pipe it onto the cookie.


Leave a Review